Indications:
- Examination of tympanic membranes and ear canals as a part of routine clinical examination in ENT
- To visualize ear drum in patients with complaints of ear pain and URI
- To perform serial examinations over several months to check for resolution of effusion in children with middle ear effusion
- In patients with complaints of hearing loss to rule out ear drum pathology
Relative indications:
- In the presence of otitis externa, the ear drum will be difficult to visualize because of occlusion with pus
- To test for ear drum mobility
Steps:
Equipment required:
- Otoscope
- Aural speculum
- Otoendoscope (straightening of external canal is not needed if Otoendoscope is used)
Straightening of external auditory canal:
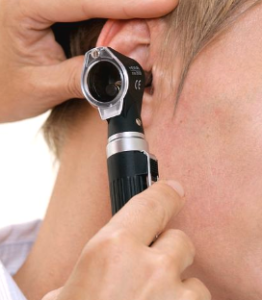
The external auditory canal is not straight and hence it should be straightened to make the external acoustic meatus in line with ear drum. Straightening of external canal is achieved in adults by gently pulling the auricle upwards and backwards. In children the auricle should be pulled downwards and backwards in order to compensate for the lack of bony portion of external auditory canal.
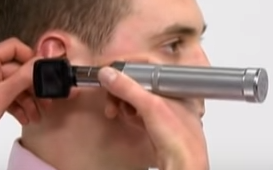
Otoscopy: is a procedure where in the ear drum can be examined using an otoscope. The role of the speculum in the otoscope is to straighten the external canal and make the ear drum visible. If this procedure is not performed in a systematic way the findings are likely to be missed.

Components of otoscope:
It contains a handle and a head. The head of an otoscope contains a light source which could be in the form of LED bulb / fibre optic illumination system, and a simple magnification lens (about 8 diopters).
The front end of otoscope has provision for attaching disposable ear speculum.
The head of some otoscopes has provision for attachment of siegle bulb which can be used to test the mobility of ear drum.
Power supply:
Power supply to otoscope is from rechargeable batteries provided. Otoscopes used in doctor’s office will have wall mount power supply provision.
Types of grips used:
Hammer grip:
In this type of grip, the otoscope is held like a hammer by gripping its handle between the thumb and forefinger. The fingers are close to the light source.

Pencil grip:
This grip allows better control of the otoscope. In this type of grip, the otoscope is held like a pencil, between the thumb and the forefinger. The ulnar aspect of the hand rests firmly but gently against the patient’s cheek. If this technique is used, injury can be prevented by the cheek support even if the patient moves the head.
Step I: Optimal size of the ear speculum should be selected. This is important because a narrow speculum limits the visible zone of the ear canal and ear drum causing the examiner to make errors.
Step II: The first structure to be visualized / sought for is the handle of the malleus since it is the most prominent portion of the ear drum.
Step III: The scope is now tilted superiorly bringing into view the lateral process of the malleus. The attic portion of the ear drum comes into view now.
Step IV: The scope is tilted now anteriorly to examine the anterior portion of the ear drum
Step V: The scope is tilted inferiorly to view the hypotympanic portion of the ear drum
Step VI: Now the postero lateral wall of the external canal is examined by tilting the speculum.
Step VII: Seigalisation of the ear drum is performed to test its mobility.
Normal findings:
Auditory canal – Presence of hair, yellowish brown cerumen
Ear drum – Pearly white in color, translucent and in neutral position
Malleus lies in oblique position behind the upper part of drum
It is mobile with air inflation